Showing posts with label Recipes. Show all posts

Friday, October 11, 2013

Falloween Centerpiece! {Pumpkin Parade Linky Party}

I'm going to interrupt my wedding catch up posts to join in the Pumpkin Parade!  Who doesn't love this time of year - if I could count how many times I saw someone post "First pumpkin iced chai latte of the season!" on their fb newsfeeds I would be, well, counting very high.  But for reals, Fall is the best season, especially in the Northeast.  Stockings and scarves for the win!


So Saturday it was my turn to host Book Club and we read The Cuckoo's Calling. I really loved it - we don't often read whodunit's in BC, but when we do I always think I need to read more of this genre. We always do potluck and people really brought their A games in Fall comfort food. I have no pictures of the food, but trust me, it was good (you can check our some of the past dishes we've made on our shared Pinterest board).  Since I was scrambling to have the house clean enough for guests I didn't try a new recipe, but made my tried and true Semi-Homemade Chili. That dish is bangin' I tell ya, and did not disappoint. 


The day before I went out on my lunch break ready to spend monayyy on fall decor.  Sometimes I'm just in the mood to spend money on stuff, but alas, nothing was grabbing my attention at any of the seven stores I went to. I finally picked up this black feathery owl who I thought had the right combo vibe of fall and halloween (Falloween, if you will) so I can leave him up through November from Century 21.  I had to actually purchase these mini pumpkins and this little carving pumpkin because I haven't been upstate to raid my mother's garden yet this year.  Plopped down next to some fake leaves from our Fall Date Night gift from my sister-in-law last year and some leftover amber votives from the wedding (still for sale if anyone wants them! (shameless plug, sorry)) and this centerpiece was done, yo.  The wire pumpkin was a gift a few years back, and the chargers are from Walmart, and plates and napkins were from Anthropologie. Sometimes I think more is more when it comes to holiday decorations, but in this case, I think my less is more tablescape works.


My neighborhood packs in the parades and festivals the first weekend of October. Saturday was the Ragamuffin Parade, and holy shnikes, was our 'hood a zoo.  It was super cute seeing all the kids dressed up, but I seriously think that is the most packed I've ever seen 3rd Avenue.  It took us about 45 minutes to walk one block to grab coffee and come back.  It was cute though and sooo warm out, so it was worth it a few minutes of insanity.  Sunday was the 3rd Avenue Festival, which is like any other street festival in that vendors come in and line the streets.  I didn't get to venture out for that because I was indoors canning and jamming with my aunt and cousin.  Oh yeah. I wasn't kidding when I said I was "all-Fall" this past weekend.


This was my first real foray into canning and jamming and it was a blast (not to be confused with KanJam the game, because, yes, a friend asked me that and she shall remain nameless).  Having the right tools and a few sets of hands and counterspace really makes this process go smoothly, so it went as smooth at it could go in my teeny kitchen.  You may recognize this pic from my fb page - we tried two recipes and they were both a success. Carrot Cake Jam was super sweet and I think will be delicious on some vanilla ice cream or on some warm croissants.  The Fresh Herb Jelly had a nice savory flavor - a little more subtle than I would like, but it was a great way to finally use some of basil I've been growing and will be delicious with some stinky cheese and crackers.  I am a convert and can't wait to try new recipes and methods!


Just for fun, since I didn't get a chance to link up my TV console to any of the other Fall Decor linky parties earlier this month, behold:


I know my pumpkin centerpiece wasn't the most elaborate, but sometimes, you gotta work with what you got!  I got so much done this past weekend, I'm not even a little bit disappointed in myself. For some real inspiration go check out the WAY more creative and innovative pumpkin projects linked up to these blogs:


Remember, half the fun is meet new blogs and to leave a comment!!!  I'm a regular reader of Newlywoodwards and Decor and the Dog, but I've found a ton of new blogs to add to my daily reading list!

Happy Fall, Y'all!

Thursday, July 12, 2012

Impromptu July 4th BBQ & Gardening Updates


So around mid afternoon on July 3rd, we realized we didn't have solid plans for the next day. We decided to round up some family members and bear the heat together on the 4th.

I was excited because it gave me an excuse to try a few new recipes, as well as do a little RW&B decorating.  As with most parties, we were too busy grilling and having fun to take a a ton of pictures, but I got some great "before" shots of a recipe or two I plan to share with you guys. Actually, these two:


Having this bbq also filled a void for me as we decided not to throw our big annual bbq since we have Other Things on our minds lately.

I ran to the nearby 99 cent stores and picked up a navy tablecloth, a red and white tablecloth, and some flags and a patriotic spin-y thing (technical jargon).  I scooped up some white carnations with baby's breath at my favorite bodega/cut flowers shop, and started my prep work so that I would be able to hang out with the family when they arrived.


We finally sampled some of the regional wine we picked up at Seneca Lake, NY a few weeks back
In addition to grabbing a few burgers and hot dogs so I could try this new grilling technique, I picked up some chicken legs and thighs, some ribs, and some potatoes for a new recipe I wanted to try (that came out great, and looked pretty too - recipe to come). I marinated the chicken, boiled the ribs, and smashed the potatoes in the morning.  For a simple cool dessert I made a few packages of jello and pudding in individual dishes, and had some whip cream in a can available for topping.  People brought over some easy apps like shrimp cocktails, anti-pasta salad, gluten-free pasta salad, and the most amazing fried onion rings I've ever tried, as well as  a large carafe of delicious iced coffee with kahlua to go with our dessert.

All in all - a very nice and relaxing July 4th!  Hope you enjoyed yours!

*I don't know who I was kidding when I thought I would be able to relax - I spent over an hour in front of the grill! But luckily everyone graciously worked on the clean up so I could relax after the meal - thanks guys!

****************

These are about eye-level height with me, and I've been encouraging  the vine to stay on the wrought iron instead of grabbing the fence. My luck would be that my neighbors would get all the blossoms on their side!
My morning glories are really growing! But they don't look like they are going to give me any blossoms any time soon.  I'll be certain to let you know when they do.  And an added bonus - we have "wild" cherry tomatoes growing!  I guess some of the seeds from rotten tomatoes last year decided to sprout again.  We will see if there is actually enough space in the bucket for them to grow fruitfully.  Fingers crossed!


Friday, June 29, 2012

Foodie Fridays - Spiral Cut Hot Dogs!

Hot dogs are definitely in my top three for favorite foods.  I know this statement may make you question all future recipe posts - I swear I like good, healthy, and complicated foods too.  I'm just saying, I can never say no to a hot dog.  I'm always looking for ways to spice them up so everyone else can enjoy them as much as I do.  In the past I've tried a marinade from this post, that was proclaimed "the best hot dog I ever ate" by one of my friends. So when I stumbled on this video via BoingBoing, I had to share!

I'll definitely be trying this out the next time I grill! I hope you do too...

Wednesday, June 27, 2012

Cooking FAIL

epic fail photos - College Cooking FAIL
Picture via Failblog.org
So I was whipping up a recipe for my Foodie Fridays edition - something totally random that I had thrown together in the crock pot that I was hoping would turn out awesome and be worth passing it along to you guys.  It started out ok....chicken went it, some veggies, a can of cream of mushroom and cream of chicken soup (it was a lot of chicken breast) and some spices.  I turned it on low and went to bed.  I even woke up and remembered to take it out and leave it on the stove top so it could cool before Tom put it in the fridge before he left for work.

But that is where this recipe ends.  Because I never told Tom to put it in the fridge, and we are both the type to stayinbedtilthelastsecondthenruntoworkwithoutbreakfastorcoffee so I knew he would never even walk into the kitchen if I didn't tell him to.  So at 2:28pm today I realized my mistake, and frantically texted "what are the odds you saw the crock pot and thought to put it into the fridge this morning???" but I already knew the answer.  So texting turned into google searching "how long can cooked chicken stay at room temperature" and although I got a few different answers, none of them were close to the 6 hour mark we were currently at.  

So I'm pretty sure we are having delivery for dinner for the next few nights because it's going to take me a few days to get over this cooking fail.

In other news...I finally finished making the favors for my bridal shower!  But you're not going to see them for a few more weeks since at least most if not all of my "loyal readers" are invited to the shower :-)

Friday, June 15, 2012

Foodie Fridays - Rice Ball Casserole

I scooped this out as soon as it came out of the oven and it fell apart a little bit - but it was so good!!
I am not Italian - but Tom is.  One of these days I'll list out all of the ethnicities our future children are going to have to rattle off when someone asks them what their background is - poor kids. Anyway - of course I love most Italian foods and clearly I grew up with the basics like baked ziti, spaghetti and meatballs, and parmigiana anything, but I had a lot to learn about all the other Italian staples - like potato croquettes and rice balls.  I had never heard of them until I met Tom and his family, and quickly fell in love.

So obvs when I saw this lil recipe on Pinterest, I had to try it out for myself.  This recipe has been "skinny-fied" but I just have a personal belief that some things (mainly cheese) are supposed to be full fat.  I followed pretty much everything else exactly as written but decided to use my whole milk mozzarella - it's too damn good to say no to!

Rice Ball Casserole
via Skinny Taste
  • 2 cups uncooked long grain rice
  • 4 cups water
  • 1 (2.5 oz) sweet Italian sausage link, casing removed
  • 10 oz (.65 lbs) 93% lean ground turkey (1/2 package)
  • 1/4 cup onion, minced 
  • salt and fresh pepper
  • 5 oz frozen peas
  • 16 oz homemade tomato sauce
  • 1/3 cup egg beaters or egg whites
  • 1/2 cup pecorino romano
  • cooking spray
  • 4 tbsp seasoned breadcrumbs, divided
  • 1 1/4 cup shredded part skim mozzarella (Or whole milk mozzarella if you are rebel like me!!)
Cook rice in water according to package directions. Set aside to cool. Meanwhile, brown sausage, turkey and onions, breaking up as it cooks. Season with salt and pepper to taste, then add peas and 8 oz tomato sauce and simmer on low, covered, about 20 minutes. Spray a 9 x 12 casserole dish with cooking spray, making sure to spray sides too. Add 2 tbsp breadcrumbs to the dish and roll around to coat the bottom and sides.Preheat oven to 400°. In a large bowl combine rice, pecorino romano, eggs, and 3-4 oz tomato sauce and mix well. Rice should be a bit sticky. Take half of the rice mixture (a little more if needed) and cover the bottom of the dish and up the sides; press to form the bottom layer. Add the meat and peas. Sprinkle mozzarella on top. Top with remaining rice and press until even. Top with remaining 4 oz of sauce, remaining 2 tbsp breadcrumbs, and remaining mozzarella. Cover with foil and bake 20 minutes. Remove foil and bake 10 more minutes. Serve and enjoy!

Every now and then I really impress Tom with dinner - last night was definitely one of those times! This recipe was the first I've tried of Gina's from Skinny Taste, and now that the wedding is only about 4 months away (ack!) I think I'll be trying more of her recipes.  This was incredibly filling and taste was not compromised one bit - which is important to someone who loathes dieting as much as I do. Try it and you'll agree!

Friday, April 20, 2012

Foodie Fridays - Grape, Corn, and Black Bean Salsa


Last weekend I had my Book Club meeting, and since neither of the books we read had very much to do with food (we read Look Me in the Eye and Before I Go To Sleep, both of which I liked very much), and since the weather was pretty stinking nice for April, I decided to try out a salsa recipe I had my eye on from none other than my gal Cathy at NoblePig.com (she has no idea who I am, but I love every recipe I've ever tried of hers).


I like anything that gives me an excuse to eat tortilla chips, and when I saw this grape, corn, and black bean salsa, I knew I had to try it. How often do you go to a barbeque and 5 people brought the same jar of tomato salsa with them?  This recipe sounded different enough to stand out on a table of pot luck items, but the ingredients are are still familiar that people aren't going to be afraid to try it.

Grape, Corn & Black Bean Salsa
via NoblePig.com2 pounds red seedless grapes, each grape quartered (this is time consuming)
1 jalapeno, seeded, de-veined and diced
1/2 a medium red onion, coarsely chopped
One whole bunch of cilantro
Juice of one lime
1 (15 ounce) can black beans, rinsed
1 (15 ounce) can corn, drained
3 Tablespoons white vinegar
1 teaspoon kosher salt


Toss the beans, corn, vinegar, salt, and lime juice into a bowl. Chop up the grapes and add to bowl.  Dice up jalapenos into small pieces, add to mixture.  Coarsely chop red onion and remove stems from cilantro, and place in a food processor. Pulse until you have a red onion-cilantro paste. Mix well.


My suggestions: A good rule of thumb when serving up any dish that has several chunky ingredients is to always try to cut your items to approximately the same size.  This often helps everything to cook more evenly (think carrots and potatoes in a stew) and also makes it easier for people to eat.  So when you are buying your grapes, don't make the mistake I made, and make sure you try to buy small grapes.  I had to pick up two packages, and although I took a quick peek for bruising, I didn't think about the size of the grapes.  One package had significantly longer grapes that took me an extra long time to chop up because I had to cut them into sixths, instead of just quarters, and trust me, the cutting IS time consuming!


As I was making the red onion-cilantro paste, I admit, it looked like A LOT of cilantro.  So I decided to slowly add it to the rest of the ingredients, and continue to taste.  I ended up adding everything - but I was definitely nervous when I first saw how much my "bunch" of cilantro had made.  I went against my gut to change the recipe and I'm so glad I followed it to the T! I would also suggest making this a few hours before serving, as it gives all of the flavors a chance to really meld together.  I'll definitely be making this a few more times this summer!


Friday, April 6, 2012

Foodie Fridays - Chicken, Artichoke (and Sun Dried Tomatoes!) Casserole


So don't think for a second that just because I haven't posted a recipe since January that it was because I just didn't have time to post anything.  I literally did not cook or buy food for about 8 weeks.  Straight delivery for 8 weeks, my friends.  I'm not proud of it.  But that is what happens during busy season.  I actually even had a weekend here and there when I could have cooked or baked, but I just wasn't feeling it.  So imagine my surprise when I finally came home at my regular 7:30 on Monday night and was actually in the mood to cook. Squeeee!

I generally am not a huge fan of chicken, unless in the wing form (be it buffalo, or bonchon), but one chicken dish I can get down on includes artichokes and sun dried tomatoes.  So I literally googled "chicken and artichoke recipes" and this one came up.  I made a few alterations (mostly because the idea of baking mayo makes me gag, and  hello, I wanted sun dried tomatoes) and Tom and I agreed it turned out FAN-FREAKING-TASTIC. This could be because it was the first non-Indian/Middle Eastern/Chinese/Thai dish we've eaten in months, or it could be because these ingredients just sing together so well. Plus, whenever I see "casserole" in my head I think - yay - only one dish to clean! But that is never really the case.  I actually had to wash a pan, a pot, three knives, two forks, and a measuring cup, and eventually the baking dish.  But it was totally worth it.

Chicken Artichoke (and Sun Dried Tomatoes!) Casserole
via Taste of Home

  • 2 cups uncooked bow tie pasta (I used shells)
  • 2 cups cubed cooked chicken
  • 1 can (14 ounces) water-packed artichoke hearts, rinsed, drained and chopped
  • 1 can (10-3/4 ounces) condensed cream of chicken soup, undiluted
  • 1 cup shredded Parmesan cheese
  • 1 cup mayonnaise (I used 1/3 cup)
  • 1/3 cup 2% milk
  • 1 garlic clove, minced
  • 1/2 teaspoon onion powder
  • 1/2 teaspoon pepper
  • 1 cup onion and garlic salad croutons, coarsely crushed (I skipped these because I forgot to buy them)
  • 1/4 cup sun dried tomatoes, chopped (not part of the recipe, but you MUST include these - they pack a double punch of taste and color)
Cook pasta according to package directions. Meanwhile, in a large bowl, combine the cooked chicken, artichokes, soup, cheese, mayonnaise, milk, garlic, onion powder and pepper. Drain pasta; add to chicken mixture.  

Transfer to a greased 2-qt. baking dish. Sprinkle with croutons. Bake, uncovered, at 350° for 25-30 minutes or until heated through.

Both of these photos are of the casserole before it went in the oven. It was so good that we ate it before I  remembered to take a shot of it fully baked!
My suggestions: I thought it tasted just great with less mayo, but if you are the type that likes to follow recipes to the T - let me know how it comes out.  Also, it's not really a chicken, artichoke and sun dried tomato casserole without the sun dried tomatoes.  After I chopped a few up, I mixed in about 2/3s of them with everything else to evenly distribute, then the remaining amount I sprinkled on top just because they really popped against the rest of the mostly cream colored ingredients.  

Friday, January 20, 2012

Foodie Fridays - Mini Goat Cheese Appetizers (or Biscuits, or Grands, or Puffs)

Onto the deliciousness that is goat cheese.  I'll take it pretty much any way I can get it, so I always jump at a recipe that includes it.  I found this one over on eggton (one hilarious chick, who also cooks and bakes and shares her recipes), but she called 'em cocktail puffs.  I feel I may have mentioned this once or twice on this blog, but my local grocery stores SUCK. So not only do I have to substitute stuff when I'm cooking because I chronically forget one ingredient, but some days it barely pays to get out of bed, because my stores are so lacking in the ingredients I want.

So when I decided I wanted to try these cocktail puffs for Book Club, I really had to get creative. Of the three goddamned ingredients, I could only get one.  So I had to sub in spicy mango chutney for hot pepper jelly (which was totally awesome and not half bad) and I had to also sub in Pillsbury Homestyle Grands for puff pastry (which again, actually worked out fine). What I'm getting at here, I think, is this:  I'll never buy frozen appetizers from Costco again, because, no matter what I couldn't find at the store, these turned out great, and were re-donc easy. And also, I feel weird calling them cocktail puffs for lack of said puff.


I got really creative later in the week and used Pillsbury biscuits and bacon with the leftover goat cheese and more mango chutney.

Guess what? Still freaking awesome.


Check out the original recipe here from eggton. I bet it's even better than what I ended up with, but I'll probably never know, until I move out of my neighborhood.

Here is my massively altered version (massive is probably an exaggeration):
Mini Goat Cheese Appetizers
1 can of Grands (or Biscuits)
Spicy Mango Chutney (or any other jelly that excites you) (about 10 - 12 tbs)
Goat Cheese (about 10 - 12 tbs)
Great add-ins: Caramelized Onions, Chopped Bacon, Cubed Pancetta, Spinach, get crazy!

Preheat oven as directed on the can (425 - 450 degrees).  Lightly spray cupcake pan.  If you're using Grands, split them in half with your fingers (they pull apart pretty easily).  If  you are using Biscuits, pull them apart to flatten a bit (like mini pizza dough).  Place these into the cupcake pan, and fill with delicious ingredients.  Pop in the oven for about 12 - 15 minutes, or until golden brown on the edges.  Enjoy! 

I did a lot of mixing and matching when I made these both times this past week.  No matter what you add, don't skimp on the jelly, otherwise, they are too dry.  Be generous with the filling, especially if you use Grands, otherwise the filling-to-dough ratio is a little off.  These are so EASY AND DELICIOUS, you'll never bother with frozen appetizers for your guests again. And now I think I need to go make more...

Friday, January 13, 2012

Foodie Fridays - Beef and Veggie Soup

 
Thanks to getting called in for jury duty, I've been getting home at a respectable time and getting tons of stuff done around the house this week.  Today I made a simple chopped meat and veggie soup, that my mother always made for me.  Tom and I are trying to be slightly healthier, and this soup is a good jump off for both of us.  Tons of veggies and really filling!

Beef & Veggie Soup
Serves 6 - 8
1 lb ground beef, browned and drained
1 medium onion
2 - 3 carrots
2 - 3 celery stalks
8 - 16 oz V8/Tomato juice
2 - 3 cups water
2 beef bullion cubes
Additional fresh or frozen vegetables as you desire
1 tsp black pepper

Brown then drain the chopped meat, and return to pot. Add in chopped onions, celery, carrots, and any additional vegetables you've got lying around.  Depending on how many vegetables you add will determine now much tomato juice and water you need, but basically just enough to cover it. Drop in your bullion cubes and pepper and let simmer for about 20 minutes and serve!  

I skipped the fresh carrots this time since my frozen mixed vegetables already had carrots in it.Pasta or beans are always easy additions for this dish, or if you want to scale back some of the beef.  A sprinkle of parmesan cheese gives it a nice additional kick. Enjoy!

Friday, December 30, 2011

Foodie Fridays - Raspberry Streusal Bars


So I made these a few weeks back as part of a cookie exchange with a few of my best friends right before Christmas.  We each made a bunch of one or two types of cookies (I also made these chocolate chip bacon cookies), and then pooled them together and split them up evenly so everyone had a great variety.  I highly suggest finding at least one other friend that is willing to do this with you. It's a great excuse to get together, and it also forces you to make something (whereas in previous years I had high hopes and then scraped them last minute).

So against my better judgement, I have to tell you how bad I am at following directions before I give you the recipe.  I blame my mother and grandmother.  There is just something in our blood that makes us feel like we don't really need to follow the directions. I've found that for as many times as I've improved a recipe for not following it exactly, I've also ruined recipes.  And I had just recently ruined an entire dinner so Tom was giving me an extra hard time about whether or not I was going to follow these cookie recipes while I was making them.  I told him my mom already told me to skip the almonds and powered sugar, but I was following everything else to a T.  So I did that and for some reason my mixture was not coming to a nice crumble as I expected.  I even baked it longer, thinking that maybe something was wrong with the oven:


The next day I was at work and it dawned on me.  I had a brief mental fart the night before and had only put in half the butter it called for.  When I had read 3/4 cup butter, I had translated that to 3/4 of a stick of butter in my head.  Which clearly, is less than 1/2 cup, or approximately half of what the recipe called for.  I am really amazed that I have a great job at a private equity firm doing taxes sometimes.  Math is not my strong subject. Anyway, I tried the whole thing again last night, and this beauty came out of the oven:


Of course I called my mother to let her in on the secret and we had a good laugh...but what bothered both of us is that I probably made this same butter calculation mistake when I made the chocolate chip bacon cookies, and they turned out fine. I'm not really sure if what I'm saying is, don't use all the butter in the other cookie recipe, because clearly they turn out fine with only half of it.  Maybe they will be even better than what I ended up with if you use the correct amount of butter.  Or maybe I didn't make a mistake when I made those. Who knows. I certainly never will. Now I feel like I've led you to never want to trust one of my recipes again. But you should. I think. Anyway - literally copied and pasted from the original site (so no typos!) here is the recipe:

Raspberry Streusel Squares
via Cook.com
1 1/2 c. flour 
1 tsp. baking powder 
1/4 tsp. salt 
1/2 c. sugar 
1/2 c. light brown sugar 
3/4 c. butter 
1 1/2 c. quick cooking rolled oats 
1 jar (10 oz.) red raspberry preserves 
1/4 c. chopped almonds 
Powdered sugar
Combine flour, baking powder and salt in mixing bowl; stir in sugars. Cut in butter until mixture is crumbly; stir in oats. Press about 2/3's of mixture onto bottom of lightly greased 9 x 9 inch baking pan. Spread with preserves. Add almonds to remaining crumb mixture and sprinkle over preserves. Patting down lightly. Bake at 375 degrees for 30-35 minutes or until golden. Cool on wire rack. Then sprinkle with powdered sugar. Cut into squares.

Am I the only one that says rasP - berry in my head every time I try to read raspberry?  The I force myself to say raZZ - berry.  Then I get confused and annoyed at the English language. Anyway - make these for New Year's Eve!! And have a safe and happy weekend! 2012 here we come!

Friday, December 23, 2011

Foodie Fridays - Bacon Chocolate Chip Cookies!

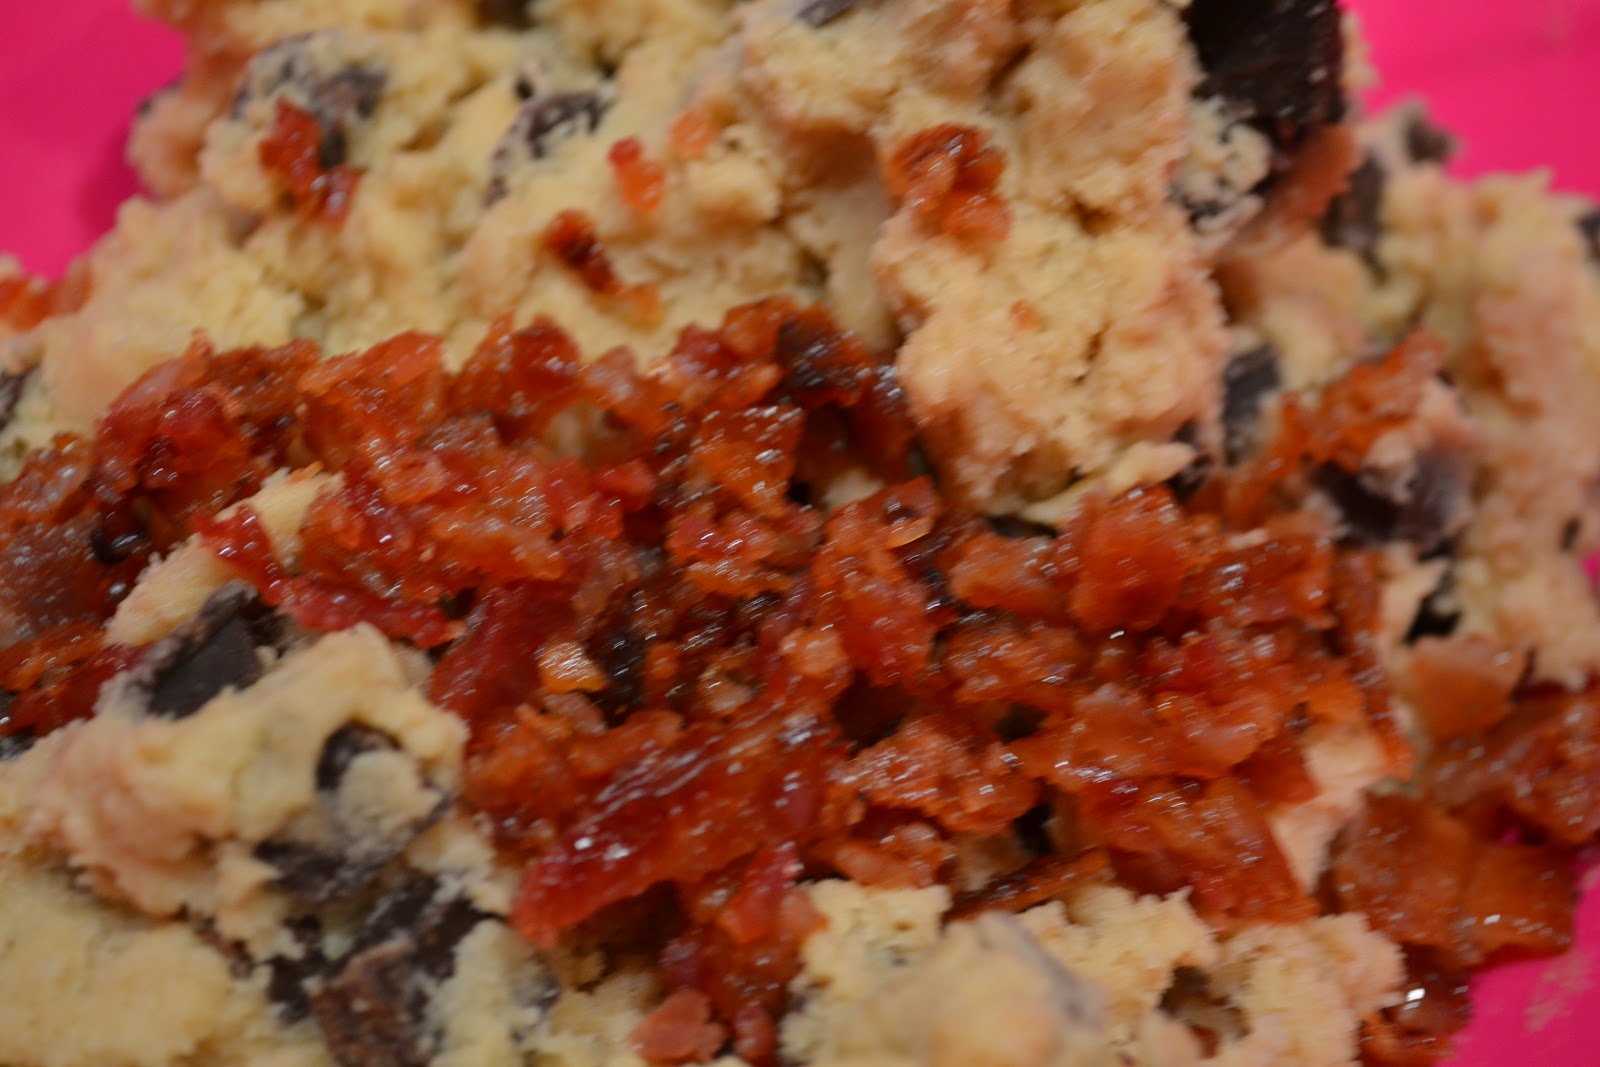
So it's Christmas Eve Eve, and you've just realized you need one more treat for Santa.  If Santa is anything like me, he loves sweet and savory.  This recipe is your basic chocolate chip cookie recipe, with a few additions. This was my first foray into the whole "bacon as a dessert" world (which I've been eye-ing patiently for a while now) and trust me when I say this will not disappoint.  I actually wish I had put in MORE bacon. Is it also weird that whole time I was making these cookies I was thinking about Katie Bower of BowerPowerBlog.com and her love for bacon? She is hilarious, and mentions bacon all the time. Go read at least her last three blog posts and come back. I'll wait.


Back? Good. This recipe is borrowed from the ever talented Kevin from ClosetCooking.com (you can go read his posts too, but make these cookies first!!):

Bacon Chocolate Chip Cookies
via ClosetCooking.com
(Makes approx 12 cookies) (I strongly suggest doubling or tripling this recipe)
1/4 cup butter (softened, feel free to replace some with bacon grease)***See below*** 
1/2 cup brown sugar (packed)
1/2 cup white sugar
1 egg
1 teaspoon vanilla extract
1 1/8 cup all purpose flour
1/2 teaspoon baking soda
1/4 teaspoon salt
1 cup dark chocolate chunks
5 strips bacon (Totally use his recipe for candied bacon)

Directions:
1. Cream the butter and sugar in a bowl.
2. Beat in the egg and vanilla extract.
3. Mix the flour, baking soda and salt in another bowl.
4. Mix the dry ingredients into the wet.
5. Mix in the chocolate and the bacon.
6. Place the dough onto a cookie sheet one table spoon at a time.
7. Bake in a 350F preheated oven for 8-10 minutes.

I'm pretty sure these cookies qualify for Christmas breakfast treats too, having said bacon in them and all. Have a very Merry Christmas!

***EDIT/UPDATE: So over the past few months I've made these cookies several times.  The first time I made them, the recipe called for 1/2 cup of butter (or 1 whole stick) but in my head I read that as 1/2 stick (or 1/4 cup). They came out great, and I was none the wiser to my mistake until I screwed up this recipe.  Since then, I've made the cookies with the 1/2 cup or 1 full stick of butter, and they were not as good!!  They flattened out like pancakes, and I like my cookies chunky!  So I tried it again, using half the butter and my mistake definitely made this recipe better.  The recipe above now lists 1/4 cup of butter, which is exactly what I suggest you use (unless you are doubling, duh).  Just know that if you've looked at this in the past, it used to say 1/2 cup and I believe that it is so much better this way! And you can't complain about it being a bit healthier with less butter too :-)***

Friday, December 16, 2011

Foodie Fridays - Crock Pot Beef Stew

It's the first edition of Foodie Fridays!  You can check out all of my previously posted recipes (posted on random days of the week before I got my act together) here.


Who doesn't love an easy crock pot recipe that involves a favorite comfort food.  At the first sign of cold weather I broke out my crock pot to make a simple beef stew. I'll give my mom most of the credit on this recipe, but it's one of those dishes that everyone makes in their own unique way.  This is how I made mine this past week:

Crock Pot Beef Stew
(serves 6 - 8)
1 lb cubed beef lightly floured (I did 1/2 lb of the beef chuck cheap stuff and 1/2 lb of the more expensive top sirloin)
1 medium white or yellow onion, chopped
3 - 4 carrots, chopped
3 - 4 stalks of celery, chopped
2 - 3 potates, cubed
12 oz can beef stock (or water and beef bouillon)
1/2 cup water (enough to cover the food in the pot)
1 tsp paprika
1 tsp all spice
1 tsp minced garlic
1- 2 bay leaves
Salt and pepper

Chop up your vegetables and meat to be approximately the same size chunks (this will help everything cook more evenly).  Lightly coat your meat chunks with flour (this will help to thicken the gravy, you can also sear the meat quickly in a frying pan at this point but I usually skip that step). I put my vegetables in first and meat on top.  Add your spices to your liquid, give it a stir, and pour over top.  Add water as necessary to just cover everything.

You can cook it all on high for about 5 - 6 hours, or on low for 7- 8 hours.  Or if you are like me, I cooked it on high for about 4 hours, gave it a stir, and then cooked it on low for another 10 hours because I forgot to set an alarm to get up in the middle of the night to turn it off.  Everything still tasted great, and the the vegetables weren't over cooked. Remove the bay leaves, boil up some egg noodles or rice right before serving and pour the stew over top. Enjoy!

Tuesday, November 29, 2011

Bloomin' Onion Bread Appetizer


I hope everyone had a Happy Thanksgiving! Ours was great.  We stayed in Brooklyn and enjoyed some fried turkey, two different rice stuffings, and lots of great veggies and desserts.  My contribution to the mix was trying out this amazing "bloomin' onion bread" that was a hit.  I already can't wait to make it again when I have a holiday dinner with some of my girlfriends in a few weeks!


This was super easy.  Simply cut your loaf of bread (of course I couldn't find sour dough at any of our local bakeries but white worked just fine!) horizontally and vertically without cutting all the way through the loaf.  Mix up your melted butter, chopped green onions, and poppy seeds and pour it into a ziplock.  Make a big enough snip in the corner of the bag so that the green onions can get out.  Pour about half of it carefully down into the cracks of the bread. Next, wedge in your slices of cheese.  Don't worry about getting it in between every single crevice.  Pour the remaining butter/onion/poppy seed mixture over the top and pop it in the a 350 degree oven for about 15 minutes covered in foil.  Remove the foil and let it bake for another 10 minutes so the cheese gets nice and melty.  Enjoy!


Bloomin' Onion Bread
adapted from ChangeableTable.com
1 unsliced loaf sourdough bread
1 pound Monterey Jack cheese, thinly sliced
1/2 cup butter, melted
1/2 cup finely diced green onion, with tops
2 -3 tsp poppy seeds

Directions:
Cut the bread lengthwise and width-wise - without cutting through the bottom crust. Place on a foil-lined baking sheet. Insert cheese in between cuts. Combine butter, onion, and poppy seeds. Drizzle over bread. Wrap in foil; place on a baking sheet. Bake at 350 degrees for 15 minutes. Unwrap. Bake 10 more minutes, or until cheese is melted.

Monday, November 7, 2011

Pumpkin Cream Cheese Filled Muffins!


These ARE decadent. I actually found this recipe via Pinterest.com and I've been dying to try it.  Having some family over for our NYC Marathon Breakfast seemed like a perfect opportunity.  These really were perfectly moist and delicious, although, I did cut back on how much cream cheese filling I added to each muffin, and used barely any of the topping.  As usual with any recipe I seem to try, I didn't end up following the instructions to the T.  I'll detail some of my personal comments on the recipe at the bottom, and post the original recipe so you can make your own decisions, but don't make any mistake about how great these turned out! Absolutely delicious!


 I actually prepped the cream cheese filling (which goes into the freezer) and the crumbly topping the day before, and they worked out perfectly.


 Of course, when I thought I was ready to pour everything into the muffin pans, I realized - I DON'T OWN MUFFIN PANS. Crazy, right? I knew I had cupcake pans and mini-cupcake pans, and even muffin liners (but no cupcake liners of course), so apparently I either lost my muffin pans or never owned any in the first place.  Which led me to sing "Oh can you find - the muffin pans! the muffin pans! the muffin pans!" all morning. (That will be stuck in your head for at least the next hour. You are welcome.) I had to run out to get fresh bagels so I just grabbed whatever they had at our grocery store.  No biggie.


Pumpkin Cream Cheese Muffins
via Annie's Eats  (adapted from BakeSpace) (via Pinterest)

Yield: 24 muffins
Ingredients: 
For the filling:
8 oz. cream cheese, softened
1 cup confectioners’ sugar

For the muffins:
3 cups all-purpose flour
1 tsp. ground cinnamon
1 tsp. ground nutmeg
1 tsp. ground cloves
1 tbsp. plus 1 tsp. pumpkin pie spice
1 tsp. salt
1 tsp. baking soda
4 large eggs
2 cups sugar
2 cups pumpkin puree
1¼ cups vegetable oil

For the topping:
½ cup sugar
5 tbsp. flour
1½ tsp. ground cinnamon
4 tbsp. cold unsalted butter, cut into pieces

Directions:
To prepare the filling, combine the cream cheese and confectioners’ sugar in a medium bowl and mix well until blended and smooth.  Transfer the mixture to a piece of plastic wrap and shape into a log about 1½-inches in diameter.  Smooth the plastic wrap tightly around the log, and reinforce with a piece of foil.  Transfer to the freezer and chill until at least slightly firm, at least 2 hours.

To make the topping, combine the sugar, flour and cinnamon in a small bowl; whisk to blend.  Add in the butter pieces and cut into the dry ingredients with a pastry blender or two forks until the mixture is coarse and crumbly.  Transfer to the refrigerator until ready to use.

To assemble the muffins, fill each muffin well with a small amount of batter, just enough to cover the bottom of the liner (1-2 tablespoons).  Slice the log of cream cheese filling into 24 equal pieces.  Place a slice of the cream cheese mixture into each muffin well.  Divide the remaining batter among the muffin cups, placing on top of the cream cheese to cover completely.  Sprinkle a small amount of the topping mixture over each of the muffin wells.

Bake for 20-25 minutes.  Transfer to a wire rack and let cool completely before serving. 

My suggestions on the recipe:
Although the yield says 24 muffins, I only managed to eek out about 14 muffins. For each muffin I used about 2 tablespoons of batter for the bottom, a 24th of the cream cheese logs, and then another 2 tablespoons of batter.  To me, it didn't look like enough batter when I was prepping.  I would definitely suggest only using 1 tablespoon for the bottom of the pan before adding your cream cheese, so you end up with more muffins, and also so that your cream cheese doesn't float up to the top of the muffins like mine did.

I would even consider cutting the cream cheese filling recipe in half if I made these again.  I ended up only using half of it since I ran out of batter, and the muffins were not lacking in filling in my opinion.

I would also consider cutting the topping recipe down to even a 1/4 of what is above.  I barely used any of it!  It certainly gave it a nice crunch and an extra kick of flavor, so I wouldn't scrap it entirely, but again, I barely used any of it and they still tasted great!

Monday, October 24, 2011

Super Easy Naan Bread


 I love when I google a pretty specific phrase and it actually comes up.  So when "Super Easy Naan" popped up, I was sold on trying this recipe for my book club meeting this past weekend. One of the books we read this time was Cutting for Stone by Abraham Verghese, which followed the life of an Indian boy growing up in Ethiopia (I loved it and highly recommend it!).  One of our members made some spicy beef stew that is a typical dish in Ethiopia and I made the Naan, an Indian bread that is fried.  This was only my second attempt at making bread, but my first time dealing with yeast. It was definitely easier than I expected!  Here we go:


I started with the using regular yeast, pretty warm water, and sugar. I let the yeast do it's thing for about 20 minutes (the recipe only calls for 5 minutes) while I ran out to get some food for the kitties.
When I came back I added my flour and salt and let my stand mixer do most of the work with the dough hooks.  I always read the comments in a recipe before making it and many people said they had to add up to an entire extra cup of flour, but I didn't have this problem.


I oiled my bowl, dampened a cloth, and hopped in the car to go to my meeting.

 
A little over an hour later I was at my friend's apartment and flattened the dough and cut it into eight pieces using a pizza cutter.


I rolled out each section, rubbed in a little minced garlic, and fried them up!


Definitely roll out your bread thinly before tossing it into the frying pan, my first one was a little too thick (see it in the back of the pan in the last picture).  But the rest were great and it tasted just like what we get from our local Indian restaurant!  Enjoy!

Super Easy Naan Bread
Adapted from Food.com 
  • 1 1/2 cups warm water
  • 1 tablespoon sugar
  • 2 teaspoons active dry yeast
  • 1 teaspoon salt
  • 3 cups flour, plus a few tbsp for workspace 
  • Minced garlic (optional) 

  1. Combine warm water, sugar, and yeast in a bowl. Let stand for 5 minutes until foamy.
  2. Add salt and flour. Mix thoroughly. Knead dough on a floured workspace about 20 times and form into a tight ball. Put dough in a well oiled bowl and cover with a damp towel.
  3. Put in a warm place to rise for 30-45 minutes. Dough won't rise much, but it doesn't need to.
  4. Turn dough out onto a floured workspace. Divide dough into 8 pieces and roll out with a rolling pin to about 1/8" thick.
  5. Grill naan pieces on a grill or electric griddle. In a pinch, a frying pan sprayed with some nonstick cooking spray will work. Grill for 1-2 minutes on each side.

Monday, July 18, 2011

Countdown to our 4th Annual BBQ!


This coming Saturday will mark our 4th Annual BBQ at our apartment in Brooklyn. It started as a simple apartment warming party, but people had fun and asked if I was doing one the following summer. Three years later, here we are! (Yes, my math is correct because are first BBQ was in "year zero"...think about it.)

Our plan of attack for the day has changed over the years, and by this time around I feel like a seasoned veteran to the extent that I'm actually going to try some more involved fare for my guests.

The first year was actually pseudo potluck - I assigned people what to bring (hot dogs, buns, plates, veggies, etc.). While this way ended up pretty cheap for our pockets, all of the prep work had to be done as people showed up with their items. Everyone had a great time but it was too chaotic for my blood. The second year we did everything ourselves and asked guests to donate cash to the cause (we've typically made about 50% of our money back and we are fine with that). I was able to chop and husk to my hearts content either the night before or the morning of and it worked out pretty well. It's a late afternoon to late night affair with guests coming throughout that time span so the grill stays on for hours.


By the third year, I was getting more comfortable with what people would eat, and decided to add a feature to the mix - BACON. And the bacon wrapped hot dogs were born (ok, we probably weren't the first to think of this but damn, we were proud of ourselves). I learned pretty quickly that cooking bacon on a grill can be slightly dangerous (um, have you ever seen a bacon grease fire? It's a little scary for a few minutes). Feeding 40+ friends their bacon fix can get a little scary as well - but it's also so much fun. Also, have I mentioned that every single year our bbq falls on the HOTTEST day of the summer for NYC? So a fire isn't exactly what we need when it's already that hot out.


This year I'll definitely be getting more creative than ever before. I test drove this hot dog marinade this past weekend, and I'm planning on making some pulled pork sliders in the crock pot the day before. I'm also going to attempt these S'mores bars if I can time everything right.  I generally don't decorate too much, aside from the bright table clothes and plates I mentioned in this post, but I'm thinking I can handle these paper stars.  We will see how the week goes and what I actually get done.